Understanding the Blacklist and Whitelist Feature
You’ll find the Blacklist and Whitelist Feature under the Internal Link Juicer’s “Settings” section. Let’s explain how to find everything you’re looking for.
-
Open the “Content” tab
You’ll see three tabs under the “Settings” section: “General”, “Content” and “Links”. Click on “Content” to get to the Blacklist and Whitelist settings.
-
Add post types that should be used for linking (Whitelist)
Under these settings, you can choose what post types you want to link. Here’s where you can tinker with the options to add the general post types that you want to build links with.
-
Exclude specific posts or pages that should NOT be used for linking (Blacklist)
Not all your content is relevant for link building. Here’s where you can exclude specific posts or pages from the general post type settings. Whatever your reasons – the content isn’t relevant or maybe it’s outdated – you can exclude this specific post or page from being incorporated into the automated link building process.
-
Save, save, save
Saving is everything. To keep your changes, you must click on “Save Changes” at the bottom of the tab. Don’t forget to click it after every significant update!
More on the Blacklist and Whitelist Feature
Ready to define what content will (and won’t) be linked? First, go to the “Settings” section on the left-hand bar. Then, click on the “Content” tab to find the content settings. This is your hub for adding post types or excluding specific posts. Let’s get into the nitty-gritty.
Whitelisting post types
Once you’re in the “Content” settings, you’ll find the Whitelist text field second from the top. This text field is where you can define what post types will be allowed to link automatically to other posts.
Just click in the text field and a dropdown will open. From here, you can find all the public post types that you have set up in your WordPress. Scroll to the post type you want to be available for linking and click on it. Once added, your selected post type will appear in the text field. Every post type selected here will be used to link out content. If it’s not listed, it won’t be used to automatically generate internal links.
Finally, click “Save Changes” at the bottom of the page.
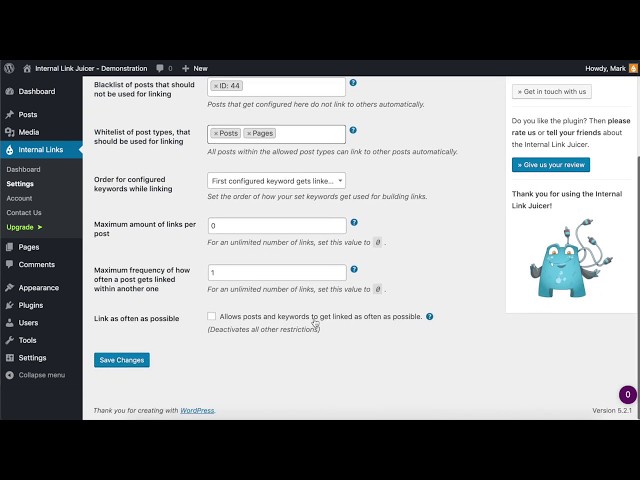
In the video, you can see a model configuration of the whitelist and its effect on linking behavior.
Blacklisting specific posts
You’ll find the Blacklist Feature at the top of the “Content” tab, right above the Whitelist Feature. Here’s where you can exclude any specific posts that you feel shouldn’t be used for linking.
Similar to the Whitelist Feature, just click on the Blacklist text field and type at least three letters to start searching for any individual post. A dropdown will open with options. Once you see the specific post you’re looking for, click on. After selecting, your chosen post will appear with its post ID in the Blacklist text field. Any post listed here will be excluded from the link building process. Even if the post type is whitelisted, any specific post here won’t be automatically linked with other content. In this way, the Blacklist Feature is good for creating specific exceptions to general post type categories.
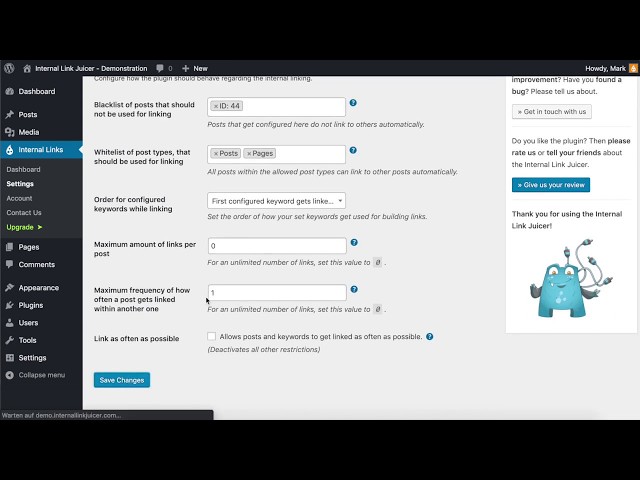
In the video, you can see how the blacklist is configured and what effects this setting has on links.
Protect individual content parts of a post
With the pro version of Internal Link Juicer it is possible to exclude parts of your content from building links.
Simply enclose the desired text block with our provided shortcode:
[ ilj_no_linking]This content will not get linked automatically[/ilj_no_linking](Remove the space after the first bracket)
Grab your pro license now!
Examples of blacklisting and whitelisting
Let’s wrap up this guide with some examples of how to use the Blacklist and Whitelist Feature. These settings are ideal for creating an automatic link building process while defining any specific content exceptions.
Let’s say you have a specific post A with a configured keyword of “hyperlink”. If you have another post B titled “Anchor Text” that includes the keyword “hyperlink” an automatic link to the original post A will be generated:

Generally speaking, this is how auto-generated link building works (and how it is introduced in “Using the Keyword Editor for Link Configuration“). However, let’s see how using the Blacklist and Whitelist Feature can affect this situation.
First, let’s say you want this post B “Anchor Text” to continue to be internally linked – as well as any posts like it. In this case, you would want to whitelist this post type. Since “Anchor Text” has the post type “Posts” you can add this type to your Whitelist.

In this way, you can be sure that posts published under this post type will always be automatically linked. This means that the example of “hyperlink” in text B “Anchor Text” above will be linked, as well as any other link connections found through keywords. In addition, all posts (A, B, C, etc.…) under the type “Posts” will be linked when the keyword “hyperlink” appears, as well. Great, right?
But what if you don’t want text B “Anchor Text” to be linked? If for any reason you don’t want this specific post to be generating links automatically, you can exclude it using the Blacklist. All other posts under the type “Posts” will continue to be used – just this specific post won’t be.
To do this, just search for the text “Anchor Text” by typing in the Blacklist text field. From there, you’ll find it in the dropdown list as “Anchor Text”. Once you click on it, its post ID will appear. In the example, the post ID for “Anchor Text” is 18:
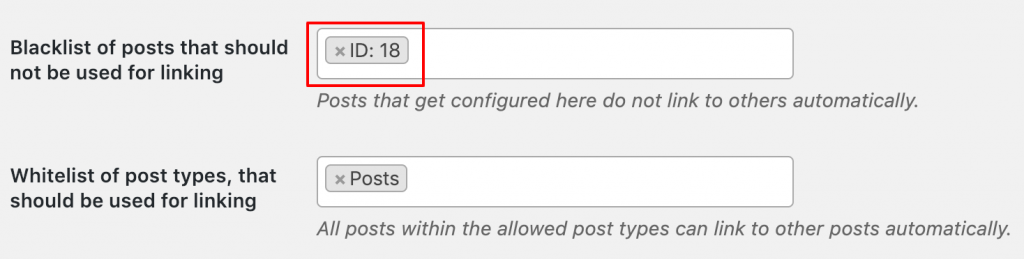
Once you click “Save Changes” below, this will mean that the “Anchor Text” paragraph will no longer automatically link to your keyword “hyperlink” because it has been excluded using the Blacklist Feature.
Take control of your content by using the Blacklist and Whitelist Feature to great effect!