Using the Keyword Editor for Link Configuration
You’ll find the Editor Feature when you go to create a new post or edit a previously made post. To get there, go to the “Post” section.
-
Open the post you want configure links for
You have two options here. Either click on the post title or “Add New” to create any new content you hope to link.
-
Add relevant keywords
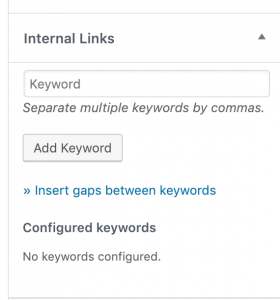
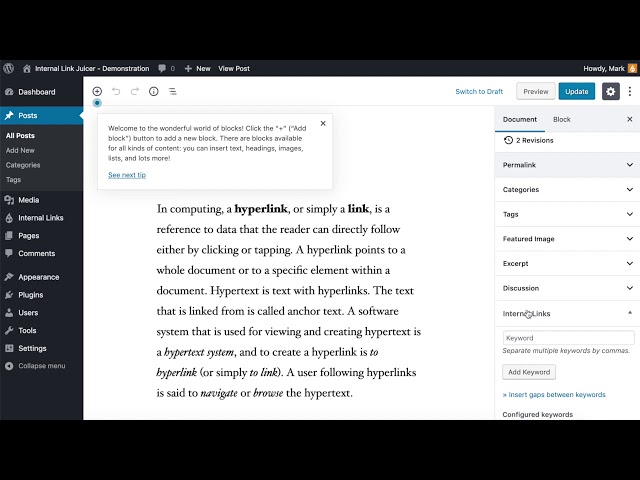
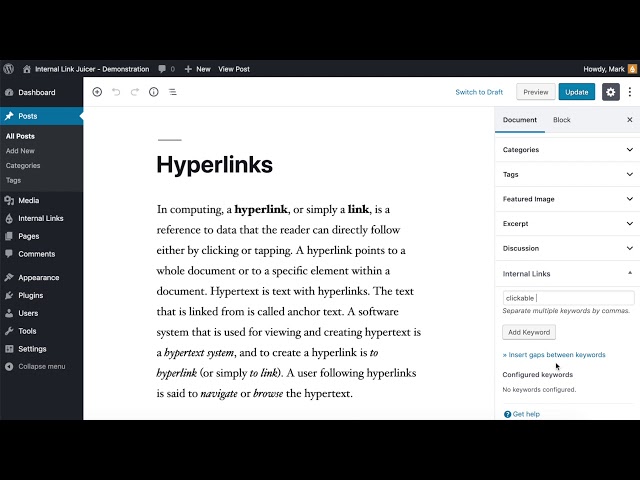
Once your content is ready, it’s time to think up keywords. The Internal Link Juicer is located within your post on the right-hand bar. Scroll down to the section “Internal Links” to start the keyword magic!
-
Save, save, save
After every keyword addition and variation, make sure to save the post so that your updates and changes are kept.
Using the Editor Feature
If you’re ready to add relevant keywords, you’re in the right place. Just go to the “Internal Links” section in the right-hand bar on the post editor.
In the following video, we’ll show you how to get to the Keyword Editor of a post or page.
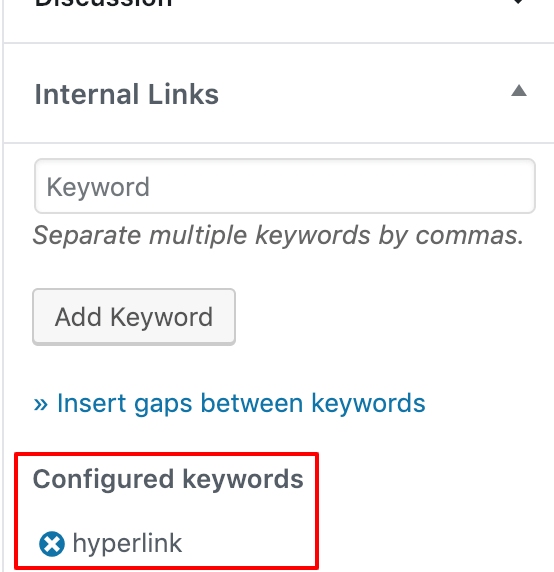
Once there, type a keyword into the “Keyword” bar, click “Add Keyword” and save the post. It’s that easy!
You can check that your keywords have been properly saved by looking under the “Configured keywords” section. Your keywords should appear under this heading once saved.

If you want to add multiple keywords at the same time, just separate them using commas. This is a great feature if you want to brainstorm new keywords for your links all at once. Don’t forget to save the post, too!
Activating the keyword editor for categories and tags
In the basic version, only posts and pages can be configured to create or receive links. With the pro version of Internal Link Juicer this powerful feature is also active for taxonomies (categories and tags) and their description texts.
Simply go to the editor of a taxonomy and you will find the keyword editor among the other setting options.
Grab your pro license now!
Inserting gaps between keywords
Besides just adding keywords, the Editor Feature has a special gap feature that can help boost SEO. The idea behind inserting gaps is to create variations on your keywords so that there is a diverse pool of phrase matches. This creates more linking possibilities for your content!
To use this feature, first click on the link “Insert gaps between keywords”. This will open the gap interface within the editor.
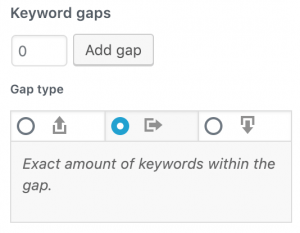
Now you should see the “Keyword gaps” and “Gap type” headings appear. To start, let’s talk specifically about the “Keyword gaps” section and discuss gap types later on.
Adding keyword gaps
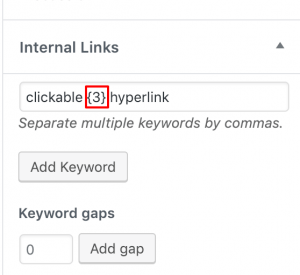
To add keyword gaps, you can use the editor interface as you’re adding keywords to the “Keyword” bar. For example, let’s say you want to add three gaps to the keyword “clickable hyperlink”.
- First, type the word “clickable” into the “Keyword” bar.
- Next, add the number of gaps you want between “clickable” and “hyperlink”. Since you want three, just type “3” into the “Keyword gap” space and click “Add gap”. Now you should see a “3” appear in the “Keyword” bar.
- Finish typing “hyperlink” to complete your keyword. It should now read as “clickable {3} hyperlink”.
- Finally, click “Add Keyword” and save the post! If you don’t click and save, the keyword will not be kept.
Adding a gap type
In the example above, you’ve used the default gap type “Exact”. However, there are three types of gaps for you to choose from that we will discuss below.
If you don’t want to use the default “Exact”, you must select a different gap type before you click “Add gap”. This is essential, because you can’t change the type afterwards. So, type the number of gaps into the space, select the gap type and then click “Add gap” for best results. (You can then follow the same steps as above: finish typing your keyword, click “Add keyword” and save the post).
Choosing a gap type
There are three different gap types that may be right for your internal link building. You may choose to set multiple gap types for your keywords. For example, in addition to adding an exact gap match, you could also set minimum and maximum parameters for matches. Here’s a quick overview of these types:
| Type | Annotation | Description |
|---|---|---|
| Minimum | {+[digit]} | In order to match a phrase within a text, the number of gap words must at least reach this number. It will also match a phrase with more words. |
| Exact | {[digit]} | Every phrase with this exact number of gap words will be matched. |
| Maximum | {-[digit]} | In order to match a phrase within a text, the number of gap words must not exceed this number. It will also match a phrase with fewer words. |
Demonstration of the gap feature
In the video, you can see an example of how to configure gaps.
Examples of keyword configurations
Let’s wrap up by giving you some examples of keyword configurations. If you want to boost your SEO, having several variations of the same phrase is key.
Let’s say you want to match the keyword “hyperlink”. To do this, you can create a simple keyword for “hyperlink,” just like in the guide above. Once done, this set-up looks like this:
Generally speaking, the keyword “hyperlink” is simply matching the word “hyperlink”. You can see your keyword match perfectly in the text below:

Easy-peasy! However, you can also add a more complex keyword like “clickable {3} hyperlink” using gaps (just like our example above). What does this mean in practice? Well, this keyword configuration is the default “Exact” gap type, which means the match will be made if and only if the text includes three words between “clickable” and “hyperlink”. Looking at this same text, this means “clickable {text in a} hyperlink” will become linked:
Cool, right? But remember that there are also two other gap types. To create matches for “clickable {text in a} hyperlink”, you can set minimum and maximum parameters instead. To do this, follow the same steps under the “Inserting gaps between keywords” section but select a “Minimum” or “Maximum” gap type instead.
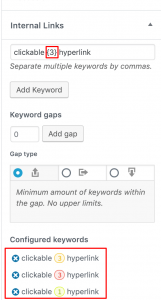
In the figure above, you can see three different types under “Configured keywords”. The yellow keyword is the “Exact” gap type that we’ve previously discussed. However, the red and green keywords show this same phrase match created with minimum (green) and maximum (red) parameters.
The minimum (green) example of “clickable {+1} hyperlink” says there must be at least one gap word. In this case, phrase matches with one or more gap words would be possible, such as “clickable {text for} hyperlink” which has two gap words.
On the other hand, the maximum (red) example of “clickable {-3} hyperlink” says there can be no more than three gap words. This parameter makes sure that results with three gaps words will appear, but not those with more. So, the phrase “clickable {text that is in a} hyperlink” wouldn’t appear because it has four gap words.
With a minimum gap word of 1 and a maximum gap word of 3, we create the same link match in our original text as the “Exact” match: “clickable {3} hyperlink”.
A final note on punctuation
Keywords with gap words respect punctuation. So, a phrase such as “[…] clickable text. For a hyperlink […]” wouldn’t be matched. Only phrases with spaces will be matched!