Using your Custom Links for Autolinking
You’ll find Custom Links under the Internal Link Juicer’s “Menu” section. Let’s go over how to locate and update your Custom Links.
-
Click on the “Custom Links” section
Once you’ve opened the “Menu”, click on the “Custom Links” section. This will take you right to the Custom Links settings.
-
Create a new link
Under the “Custom Links” settings, look for the “Add Link” button next to the header. Click there to create a new link.
-
Fill out the information about your new link
Once you click “Add Link”, start to add information about your new link. Here you’ll see fields including the title, URL, “nofollow” option, and link status. You’ll also find a “Save” button at the bottom. Be sure to fill out the fields and click “Save” to keep your changes.
-
Set keywords using the Editor Feature
Once you’ve created a new link, it’s time to configure keywords for it. You can do this by using the Editor Feature, just like you did previously for internal posts. You’ll find the Editor Feature in the “Custom Links” section on the right-hand bar. If you’re new to the Editor Feature, check out instructions for configuring keywords here. Don’t forget to click the “Save” button after adding keywords!
Using Custom Links
Here’s everything you need to know in order to configure your Custom Links. First, make sure you’re in the “Custom Links” section.
Go to the menu on the left-hand bar, then click on the “Custom Links” section to start adding custom links. Here you’ll see this screen:
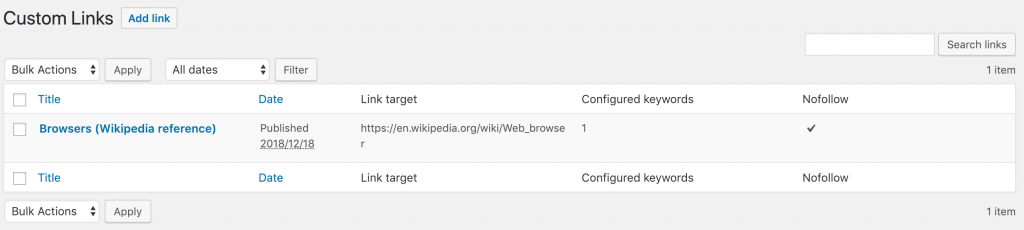
This is your go-to spot for adding external or affiliate links. Every time you add a custom link, you’ll find it in this menu. Remember that these links are distinct because they will lead to external target URLs, not on your internal WordPress pages.
In this menu, you’ll find basic information about the custom link, including the title, publish date, link URL, number of configured keywords, and “nofollow” marking. If you ever need to edit a field, you can click on the link title to update it. According to your needs, you can also create new custom links by clicking “Add Link”, find specific links using the search bar or bulk-delete entries.
Configuring your Custom Link
When creating a new Custom Link, you’ll need to use the Custom Links Editor. Here’s where you’ll fill in the previously mentioned fields, including title, URL, “nofollow” option, and link status:

First, add a title for the custom link at the top. Remember that this title is for internal use only and won’t be visible to the public. Next, add the URL in the “Target” section. This is the external URL that you have in mind for auto-linking. Then in the “Link options” section, you can decide whether the link should be marked with a “nofollow” attribute or not. Finally, you can set the “Link status” to active if you want to publish now, or inactive if you’re not done editing or you want to temporarily deactivate the link. Last but not least, don’t forget to click the “Save” button at the bottom!
Configuring keywords for your Custom Link
You’ll also need to configure keywords for your custom link, just like you would for a regular post. To do this, use the Editor Feature on the right-hand bar of the Custom Link Editor:
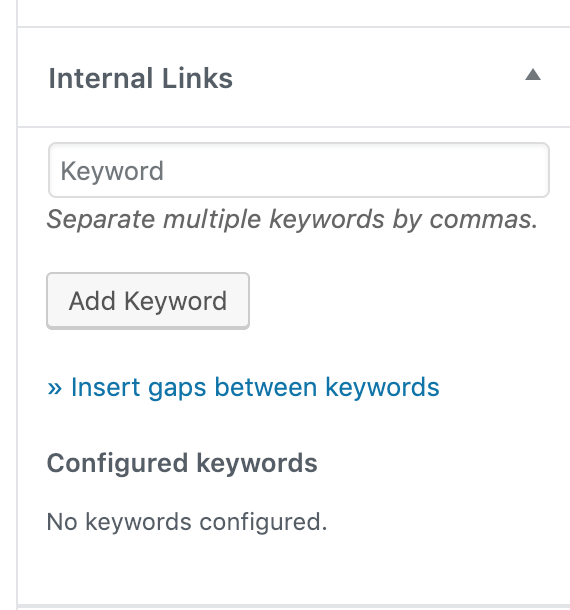
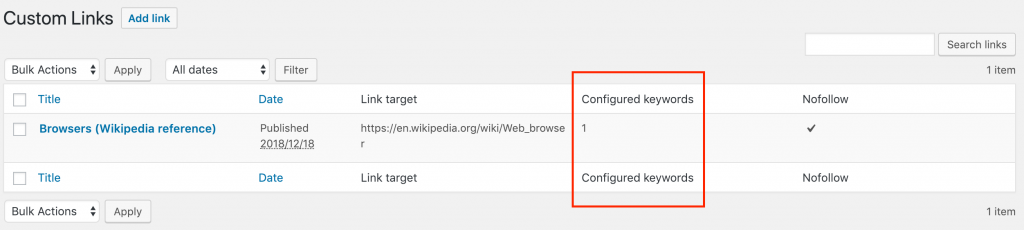
This is the same editor that you’ve used before on your ordinary posts. All you have to do is type a keyword into the “Keyword” bar, click “Add Keyword” and click the “Save” button on the Custom Links page. It’s that easy! You can add multiple keywords, too. Just separate your keywords using commas. If you want to double check that your keywords were properly saved, remember that the Custom Links menu gives this information under the “Configured keywords” header:
With the Editor Feature, you can also insert gaps between keywords and customize gap types for more personalized auto-linking. If you don’t remember how to insert gaps between keywords, you can get a refresher on the Editor Feature how-to here.
Note: If you want to customize the link output of your custom link, you can do this as well using the Link Template feature. If you’re not sure how, you’ll find more information about the Link Templates feature here.
Examples of Custom Links
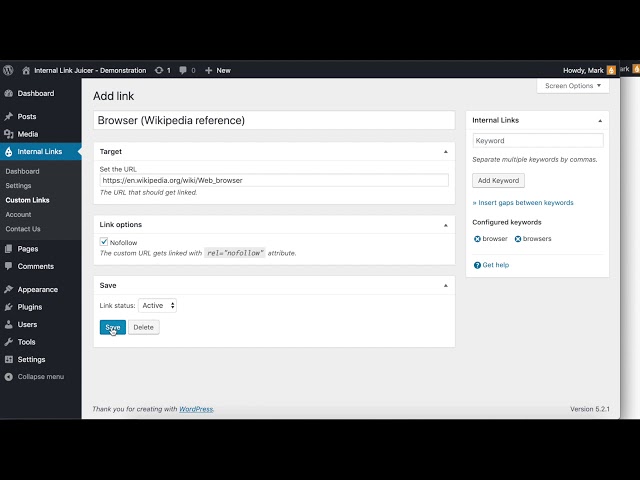
Now we’ll go over an example of a custom link in action. Imagine that you want an external link to Wikipedia’s overview on “Web browsers”. First, you’ll fill out the information about this custom link, with title, URL, “nofollow” option and link status fields, as you did above:
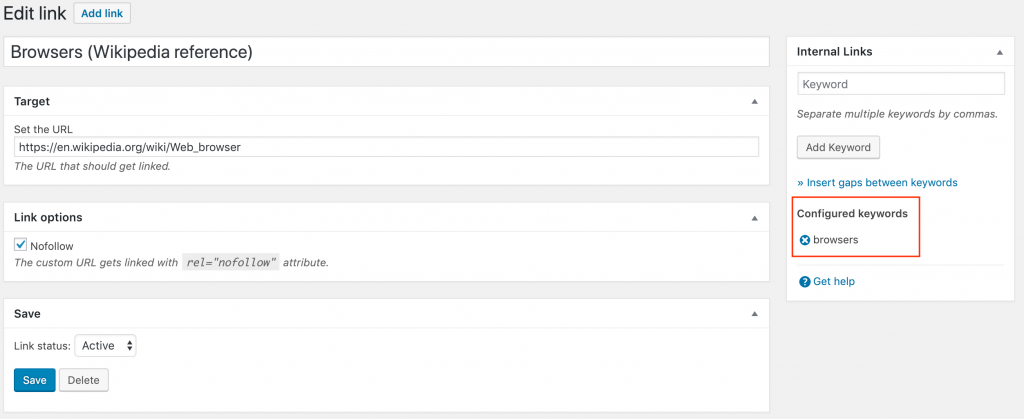
Then, after this Wikipedia custom link has been configured, you’ll need to add relevant keywords for this link. By using the Editor Feature on the right-hand bar, you can add the keyword “browsers” and click “Save”. This means that when the keyword “browsers” appears in your content, the URL to Wikipedia’s “Web browsers” page will be autolinked. For example, see the output on a random page below:
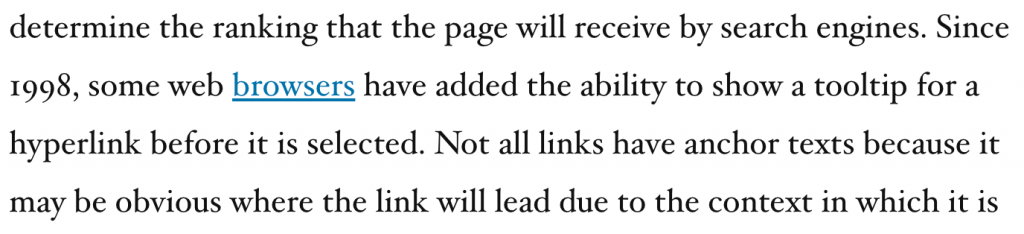
In this text, the configured keyword “browsers” appears, which means it will link to the custom link you created for Wikipedia’s “Web browsers” page. Ta-da!
Custom Links are a great way to boost your affiliate links and put your content in context. It’s up to you!